Create a wyoming satellite on RPI
This guide is for creating a wyoming satellite using a raspberry pi. This can act as a voice assistant speaker to replace google home or amazon alexa.
Materials#
- Raspberry Pi (model b or zero w)
- KEYESTUDIO ReSpeaker 2-Mic Pi HAT V1.0 https://amzn.to/3VGHVsK
- A speaker like https://amzn.to/3zlhFwx
Prerequisites#
- Home Assistant set up with Assist pipeline
- Install Rpi OS Lite (64) on the pi
- During installation, press “edit settings”
- set the hostname, username, password, and wifi info (if necessary)
- under services, enable ssh
- Determine the ip adress of the pi
- SSH into the pi
ssh [email protected]Step 1: Install wyoming satellite software #
Run the following commands
sudo apt-get update
sudo apt-get install --no-install-recommends git python3-venv
git clone https://github.com/rhasspy/wyoming-satellite.git
cd wyoming-satellite/
sudo bash etc/install-respeaker-drivers.sh
When it is done you should see
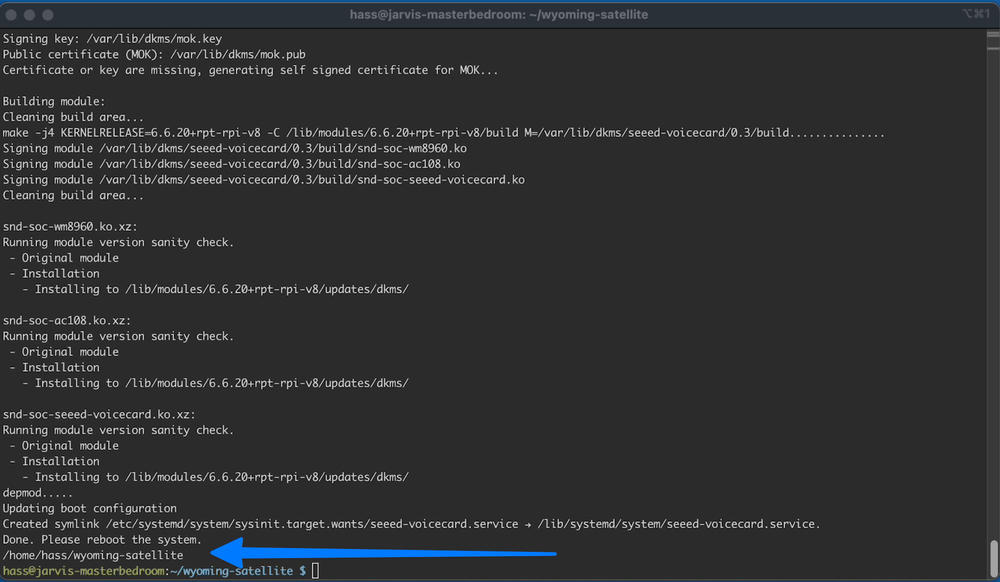
Reboot the system and ssh back into the pi. Then continue running commands.
cd wyoming-satellite/
python3 -m venv .venv
.venv/bin/pip3 install --upgrade pip
.venv/bin/pip3 install --upgrade wheel setuptools
.venv/bin/pip3 install \
-f 'https://synesthesiam.github.io/prebuilt-apps/' \
-r requirements.txt \
-r requirements_audio_enhancement.txt \
-r requirements_vad.txt
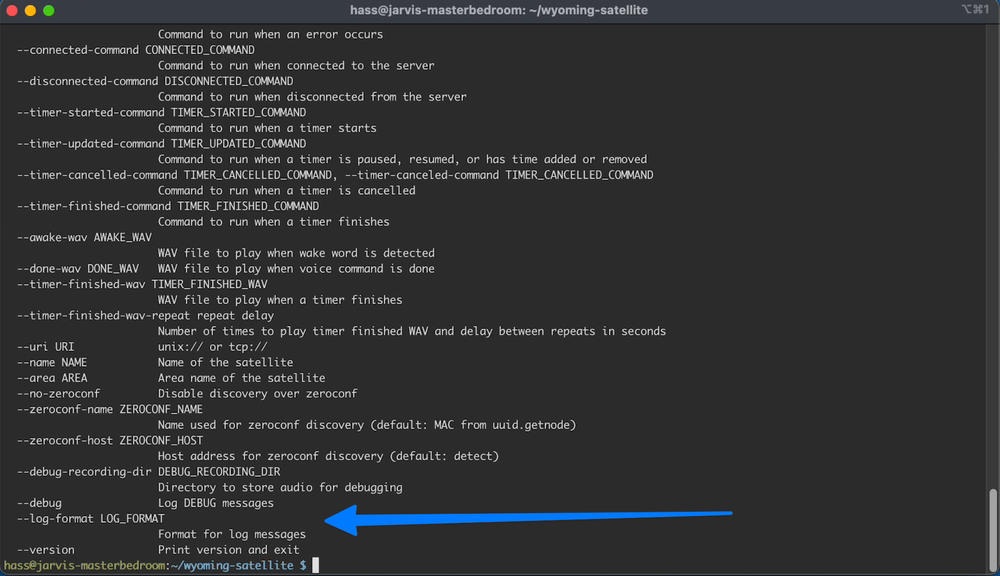
script/run --helpYou should now see
Step 2: set up mic/speaker hat#
Type this command
arecord -LYou should see something like this:
plughw:CARD=seeed2micvoicec,DEV=0
seeed-2mic-voicecard, bcm2835-i2s-wm8960-hifi wm8960-hifi-0
Hardware device with all software conversions
If it is different than above, make a note and adjust the following commands accordingly.
Run this command, then say something to record your voice.
arecord -D plughw:CARD=seeed2micvoicec,DEV=0 -r 16000 -c 1 -f S16_LE -t wav -d 5 test.wavRun this to play back your test recording.
aplay -D plughw:CARD=seeed2micvoicec,DEV=0 test.wavIf you hear your voice, so far so good.
Step 3: set up the wyoming satellite#
Make sure you are in the wyoming-satellite directory, then run
script/run \
  --debug \
  --name 'my satellite' \
  --uri 'tcp://0.0.0.0:10700' \
  --mic-command 'arecord -D plughw:CARD=seeed2micvoicec,DEV=0 -r 16000 -c 1 -f S16_LE -t raw' \
  --snd-command 'aplay -D plughw:CARD=seeed2micvoicec,DEV=0 -r 22050 -c 1 -f S16_LE -t raw'
If you go to your home assistant server, under integrations, you should see a new “discovered” integration for the wyoming protocol. Verify that it is showing up, but do not configure it yet. Go back to the Pi and CTRL-C to stop running.
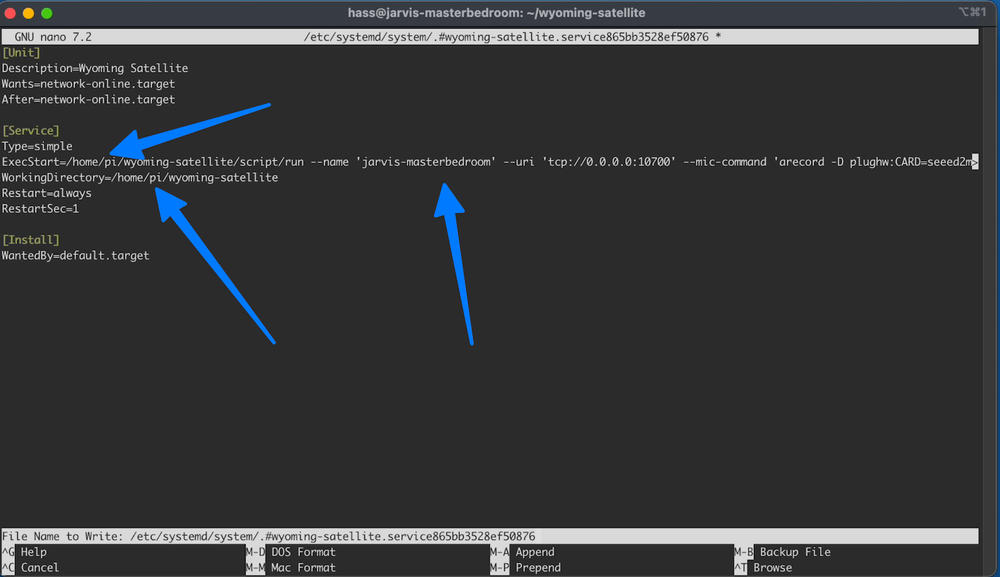
sudo systemctl edit --force --full wyoming-satellite.serviceCopy and paste the following into the file that opens:
[Unit]
Description=Wyoming Satellite
Wants=network-online.target
After=network-online.target

[Service]
Type=simple
ExecStart=/home/pi/wyoming-satellite/script/run --name 'my satellite' --uri 'tcp://0.0.0.0:10700' --mic-command 'arecord -D plughw:CARD=seeed2micvoicec,DEV=0 -r 16000 -c 1 -f S16_LE -t raw' --snd-command 'aplay -D plughw:CARD=seeed2micvoicec,DEV=0 -r 22050 -c 1 -f S16_LE -t raw'
WorkingDirectory=/home/pi/wyoming-satellite
Restart=always
RestartSec=1

[Install]
WantedBy=default.target
Make sure to edit the correct names/locations
Save and close the file, then run
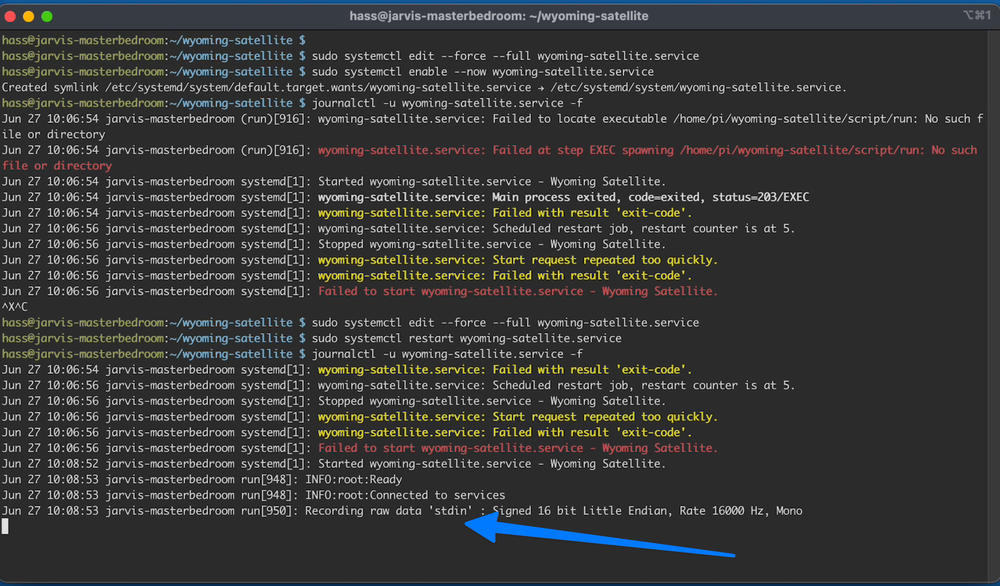
sudo systemctl enable --now wyoming-satellite.service
journalctl -u wyoming-satellite.service -f
If you see any error messages, fix your service file
sudo systemctl edit --force --full wyoming-satellite.service
sudo systemctl restart wyoming-satellite.service
journalctl -u wyoming-satellite.service -f
This is a clean output:
Now go back to home assistant > integrations. Configure the integration for your satellite (the name should match the name you gave in the service file). When done, click finish.
Scroll down to the wyoming integration, and click on your speaker. Set the assist preferred pipeline to your assist pipeline.
Step 4: Audio settings#
sudo systemctl edit --force --full wyoming-satellite.serviceGo to the line starting with “ExecStart=”, start editing at the end of the line. Add the following to the end of the line:
--mic-auto-gain 5 --mic-noise-suppression 2Save and close
sudo systemctl restart wyoming-satellite.serviceStep 5: Wake word#
cd ~/
sudo apt-get update
sudo apt-get install --no-install-recommends \
libopenblas-dev
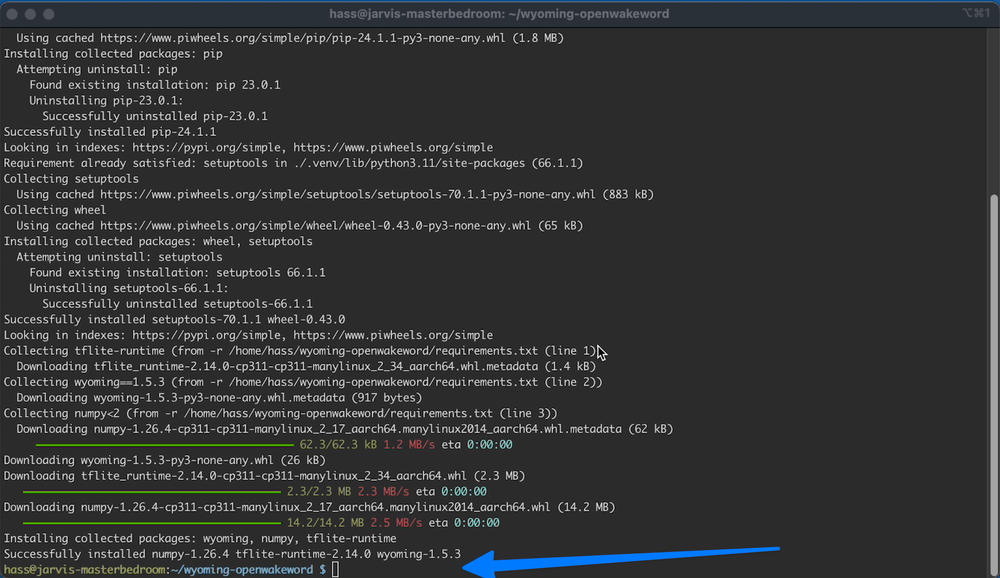
git clone https://github.com/rhasspy/wyoming-openwakeword.git
cd wyoming-openwakeword
script/setupClean output:
Next, create a service for wake work, just like the wyoming service.
sudo systemctl edit --force --full wyoming-openwakeword.service[Unit]
Description=Wyoming openWakeWord
[Service]
Type=simple
ExecStart=/home/pi/wyoming-openwakeword/script/run --uri 'tcp://127.0.0.1:10400'
WorkingDirectory=/home/pi/wyoming-openwakeword
Restart=always
RestartSec=1
[Install]
WantedBy=default.targetDon't forget to change the username/paths if needed.
Then add wake word to your wyoming satellite.
sudo systemctl edit --force --full wyoming-satellite.serviceIn the [Unit] section, add a new line.
Requires=wyoming-openwakeword.serviceThen add another bit to the end of the ExecStart line (same as earlier)
--wake-uri 'tcp://127.0.0.1:10400' --wake-word-name 'hey_jarvis'Save and exit.
sudo systemctl daemon-reload
sudo systemctl restart wyoming-satellite.service
sudo systemctl status wyoming-satellite.service wyoming-openwakeword.service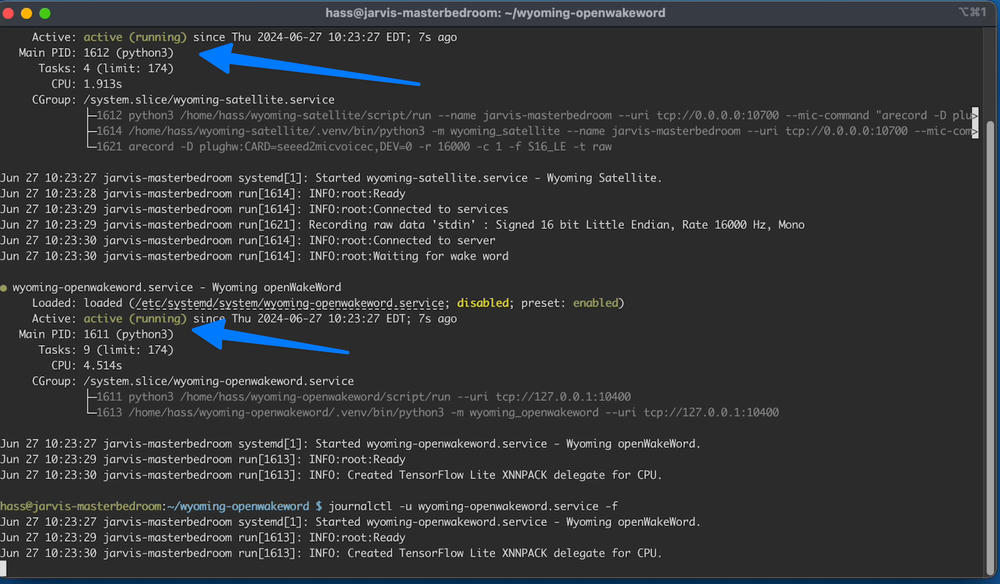
Ctrl+C to exit. Then test it out by saying “hey jarvis”
Step 6: Quality of life tweaks#
- Enable LEDs
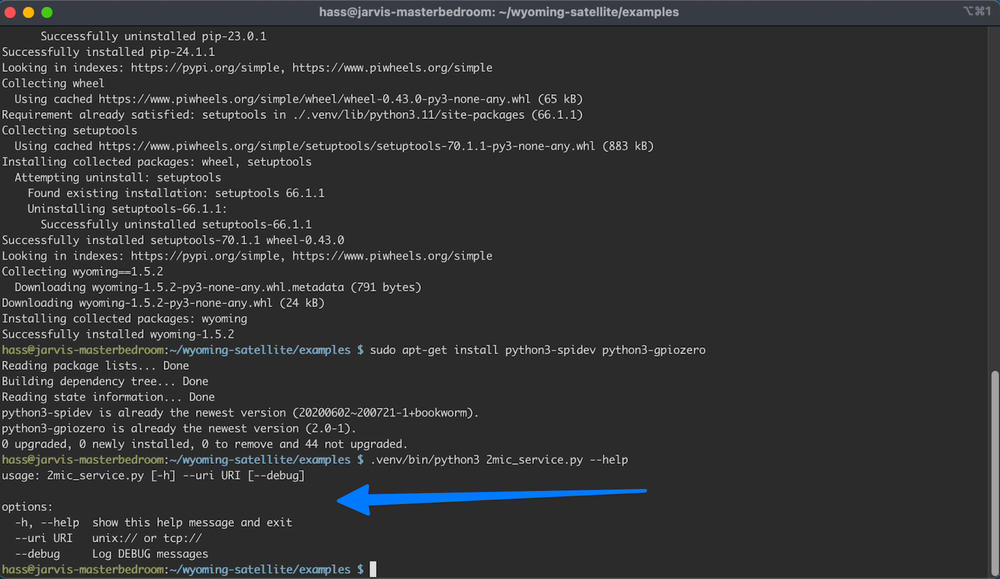
cd wyoming-satellite/examples
python3 -m venv --system-site-packages .venv
.venv/bin/pip3 install --upgrade pip
.venv/bin/pip3 install --upgrade wheel setuptools
.venv/bin/pip3 install 'wyoming==1.5.2'
sudo apt-get install python3-spidev python3-gpiozero
.venv/bin/python3 2mic_service.py --help
At this point you should see the following
Create the led service:
sudo systemctl edit --force --full 2mic_leds.service[Unit]
Description=2Mic LEDs
[Service]
Type=simple
ExecStart=/home/pi/wyoming-satellite/examples/.venv/bin/python3 2mic_service.py --uri 'tcp://127.0.0.1:10500'
WorkingDirectory=/home/pi/wyoming-satellite/examples
Restart=always
RestartSec=1
[Install]
WantedBy=default.targetsudo systemctl edit --force --full wyoming-satellite.serviceUnder [Unit]:
Requires=2mic_leds.serviceAt the end of ExecStart
--event-uri 'tcp://127.0.0.1:10500'Save and exit
sudo systemctl daemon-reload
sudo systemctl restart wyoming-satellite.service
sudo systemctl status wyoming-satellite.service 2mic_leds.service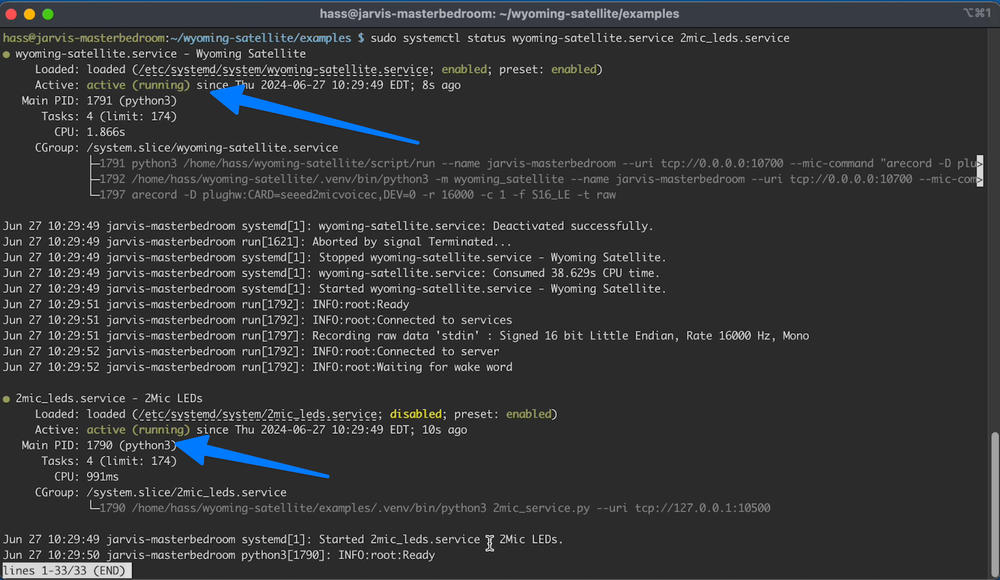
2. Wake/end sounds
Here is the complete final service file ExecStart line with wake/end sounds:
ExecStart=/home/jdupac/wyoming-satellite/script/run --name 'office satellite' --uri 'tcp://0.0.0.0:10700' --mic-command 'arecord -D plughw:CARD=seeed2micvoicec,DEV=0 -r 16000 -c 1 -f S16_LE -t raw' --snd-command 'aplay -D plughw:CARD=seeed2micvoicec,DEV=0 -r 22050 -c 1 -f S16_LE -t raw' --mic-auto-gain 5 --mic-noise-suppression 2 --wake-uri 'tcp://127.0.0.1:10400' --wake-word-name 'hey_maya' --event-uri 'tcp://127.0.0.1:10500' --awake-wav '/home/jdupac/wyoming-satellite/sounds/awake.wav' --done-wav '/home/jdupac/wyoming-satellite/sounds/done.wav' --timer-finished-wav '/home/jdupac/wyoming-satellite/sounds/timer_finished.wav'The “awake-wav” will be the wake sound, “done-wav” the end sound, and “timer-finished-wav” the timer ding.
Step 7: Custom Wake Word#
First, create the tflite file: https://www.home-assistant.io/voice_control/create_wake_word/
Copy the tflite file to the following directory on your pi
scp hey_maya.tflite [email protected]:/wyoming-openwakeword/wyoming_openwakeword/models/hey_maya_v0.1.tfliteChange the “wake-word-name” in your wyoming service file to your new wake word.